
The Guardian Costume
The Guardian Costume was created for the 'Dots and Lines' promenade performance, Wimbledon, UAL Studio Theatre.
Design:
As a piece of theatre we were keen to include a human element within our work. Initially we saw this as visible technicians, working and managing the space in a slightly performative manner. This however developed significantly due to practical reasons regarding the guiding of audience around the space and also artistic reasons as we became interested in the Guardian character featured in the hero's tale.
In researching reference images to inspire the design, I searched key words relating to the hero's journey. These included: guardian, shapeshifter, talisman, hero etc. The images generated were often of a dark, fantasy style which immediately interested me as it offered a wealth of textures,colours and layers. In early discussions as a group, we had been drawn to the idea of a dark but beautiful style, with a feeling of mystery and fantasy.
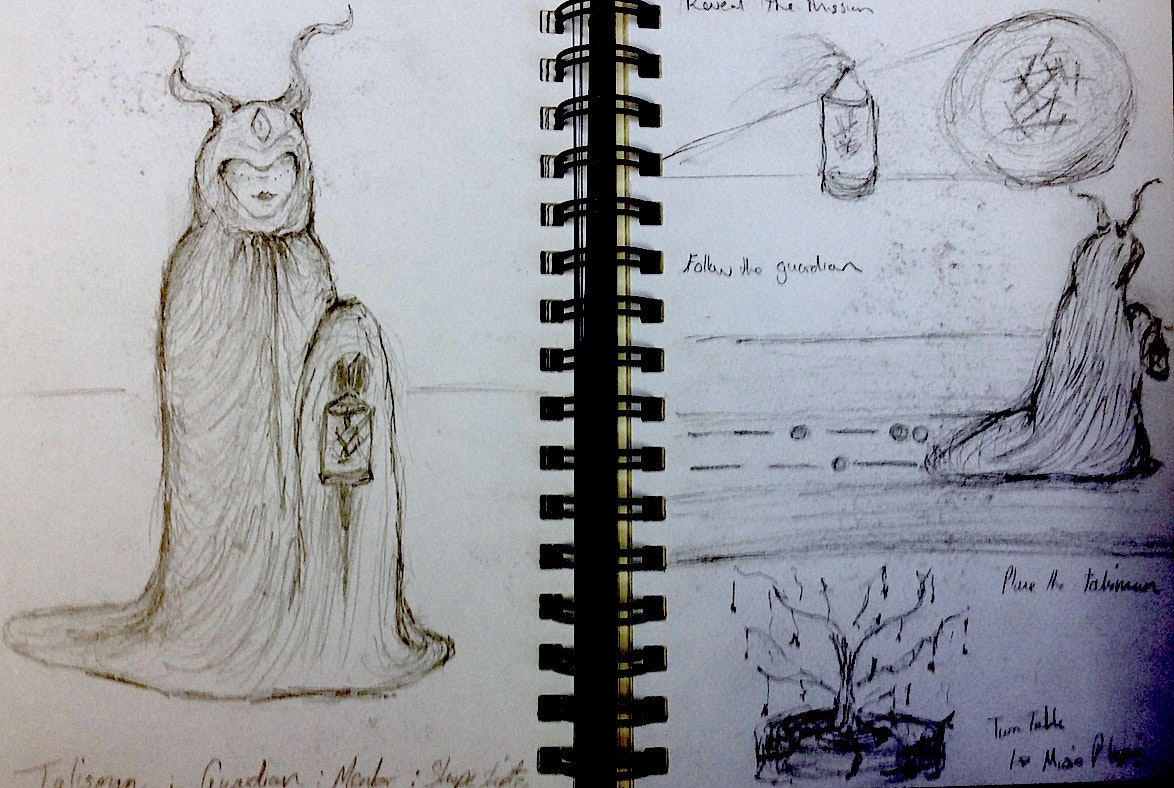
I mocked up initial sketches to inspire the idea of a guardian character which would lead our chosen hero's (audience) through the space, visiting trigger points along their journey. The character needed to by mysterious, not obviously of our world and seemingly well travelled and wise. I took reference images from both fantasy and folk art, including Charles Freger's Wild Man photos and the broken down costumes of Rosi Flood.
Key reference images which inspired the design ideas throughout the process can be found on the group Pinterest page including images relating to costume. The patchwork of images collated on the Pinterest group helped to inform the fabrics, styles, shapes and colours incorporated into the final costume.
Please visit the collaborative project page, within the MA research section of my website for a full overview of this project.
Headdress Construction
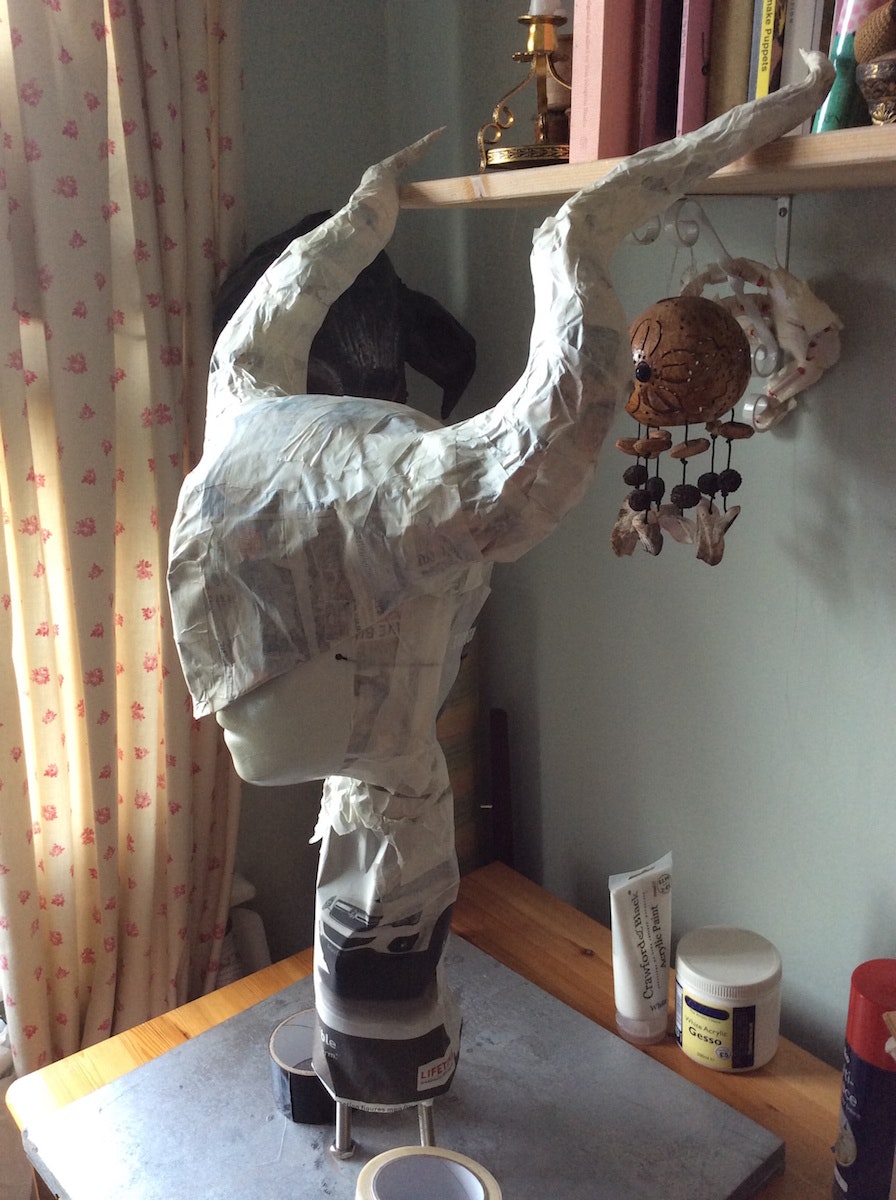
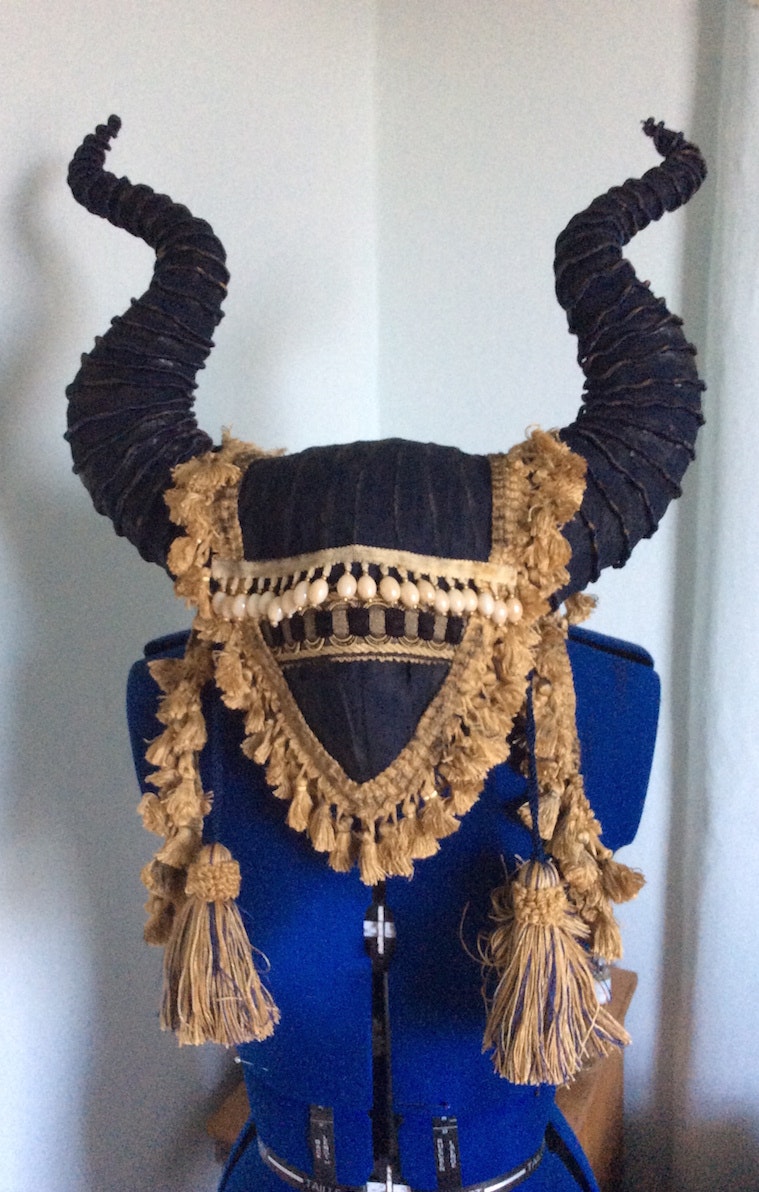
1. The headdress was built using a plastic Viking helmet as a base, which provided the perfect support and shape to form the elaborated, horned design. This basic shape was exaggerated and extended using card and wire for strength and newspaper for depth.
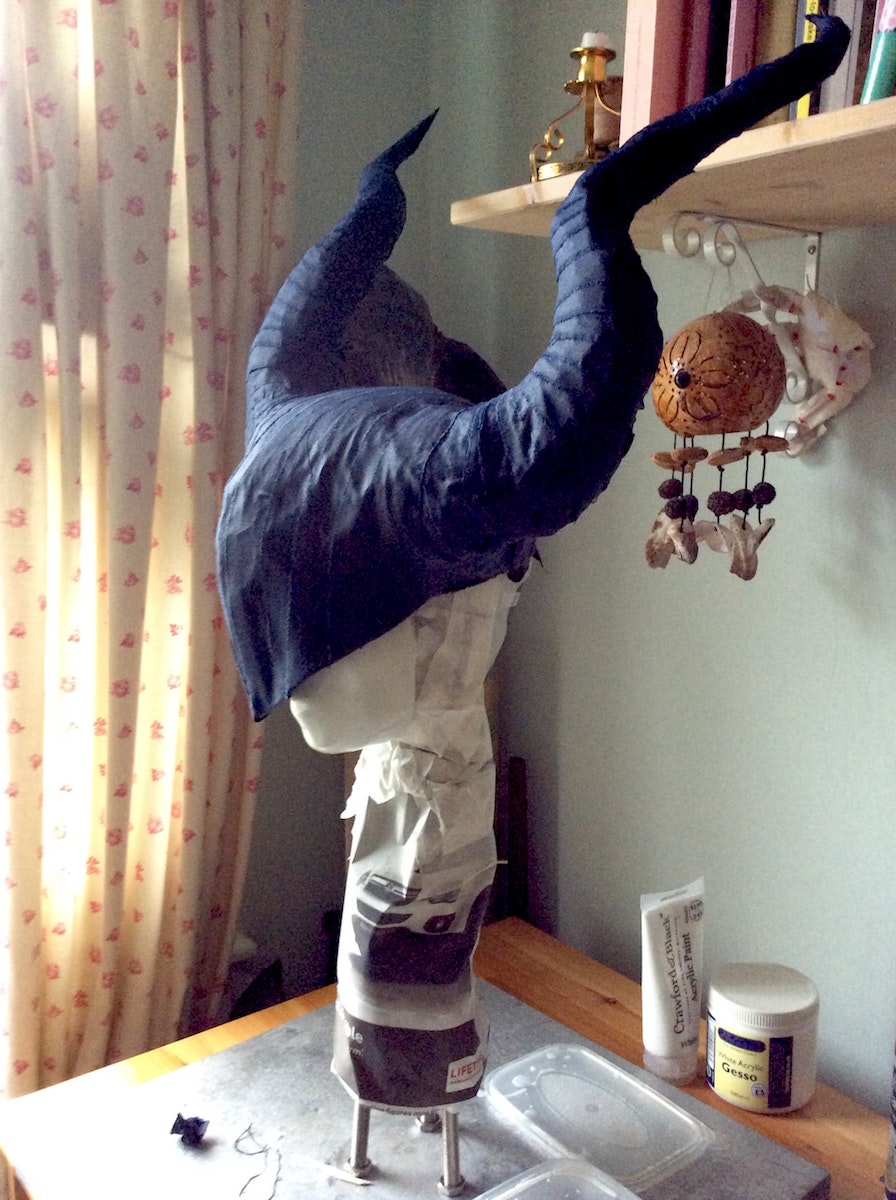
2. The piece was then covered with thin strips of navy fabric, attached with a PVA water mix, to strengthen the shape and provide a flat, uniform surface. Using fabric would give a nice texture, through the wrapping process.
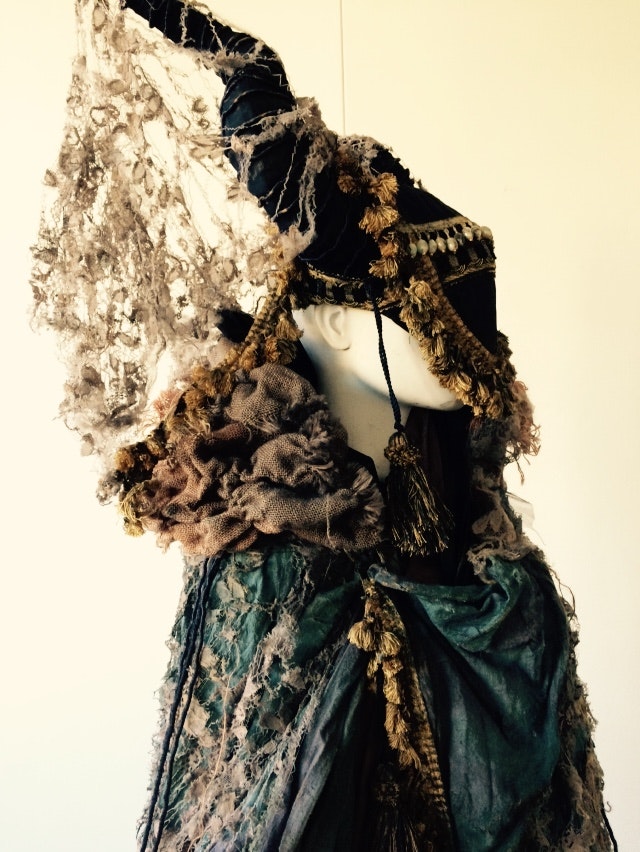
3. Braid was applied to the horns and wrapped to form interesting ridges.
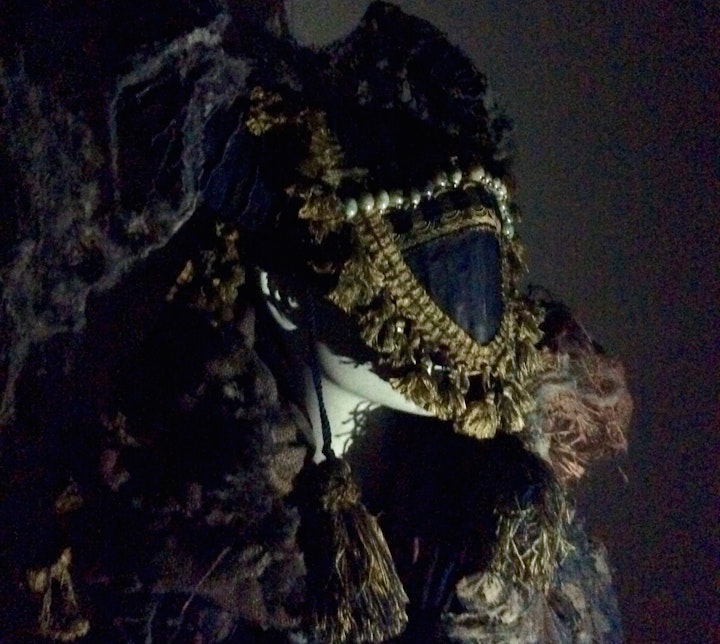
4. Upholstery tassels, cord and braiding were added to the headdress to decorate the main section.
5. To finish a dry brushing technique was used to exaggerate the textures, blend any visible glue and age the fabrics.
Costume Construction
1. A pre constructed black cloak was used as a base and lining for the cloak construction. It was hung on a mannequin for effective styling and draping.
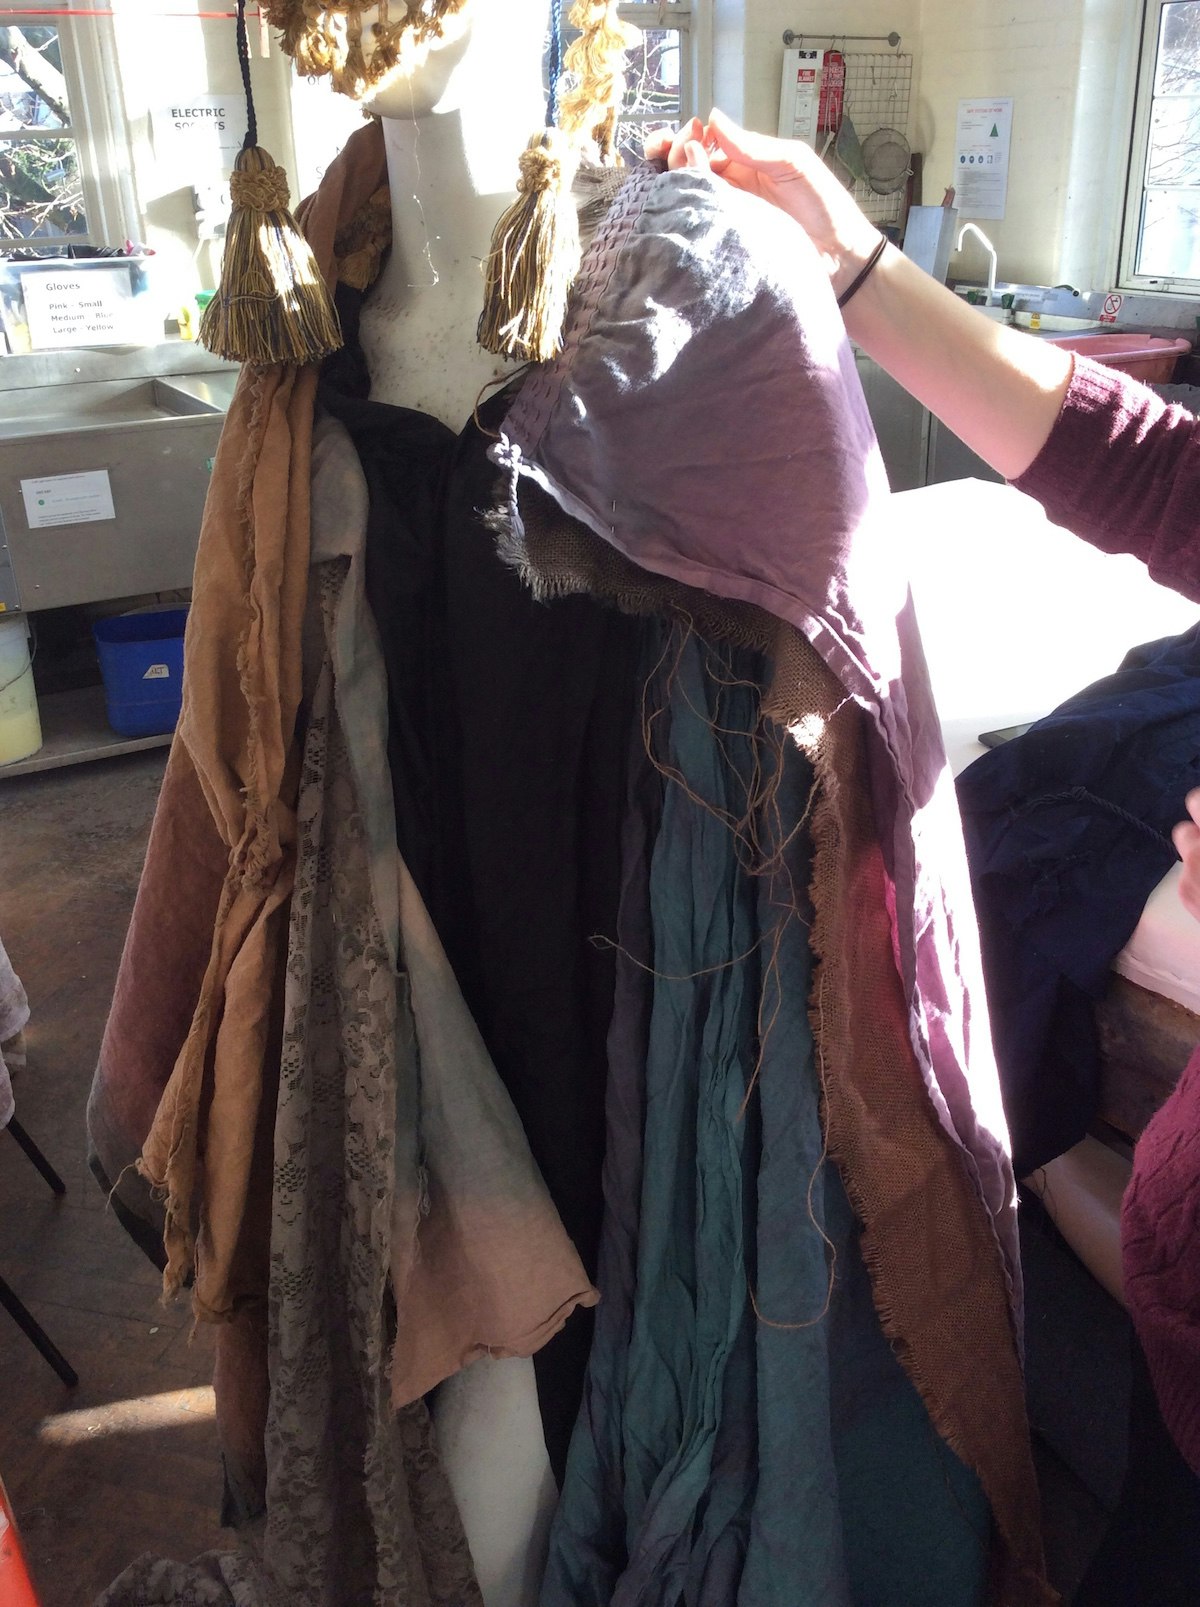
2.
The various fabrics and colours which had been
dyed (see blog) were arranged and pinned onto the black cloak.
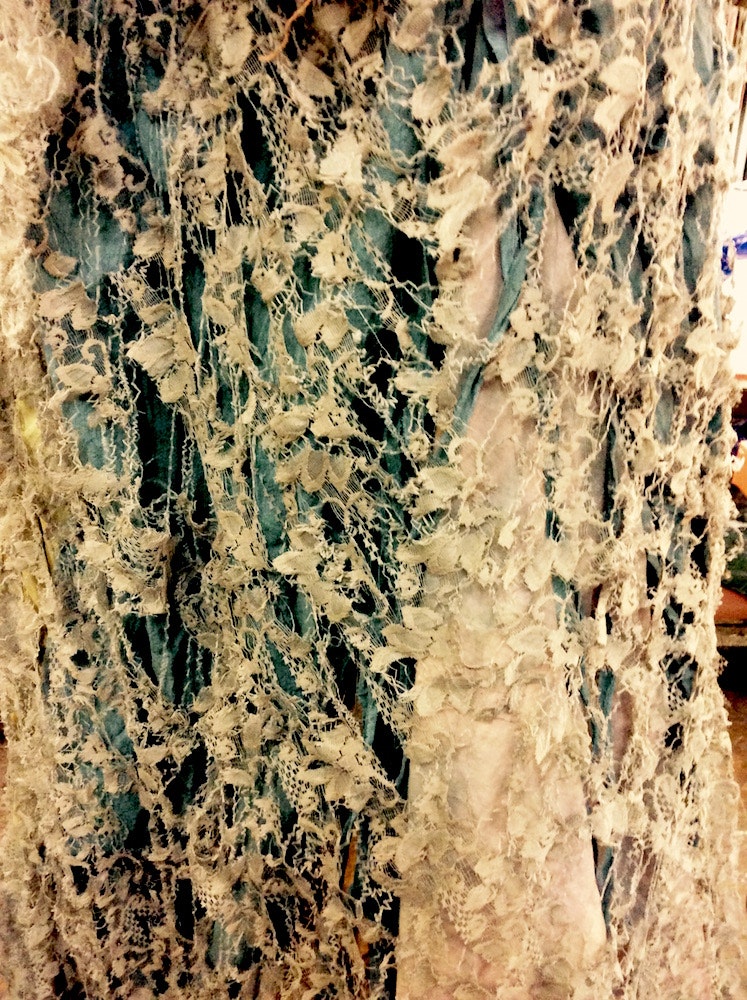
3. The lace was pulled and broken down to look more delicate and cobweb like. All the flowers were removed or distorted to create a much lighter texture, which could be layered over the other fabrics. The lace fabric was draped around the main body of the cloak as a top layer, pulling all the other fabrics together. A small piece was also draped over the horns creating a more interesting silhouette and tied in the head and body sections of the costume.
4. The hessian fabric was laddered, broken down and gathered to form a high neck collar for the cloak. It was important to include definite shapes and sections so the garment appeared structured. With so many textures, colours and fabrics there was a risk the garment could become rather messy and confusing. Stepping back from the work and taking photographs throughout was an important part of the process to ensure the costume hung together as a whole and looked effective.
5. All fabrics were hand stitched and gathered into place to form the shape, texture and range of colours in the cloak.
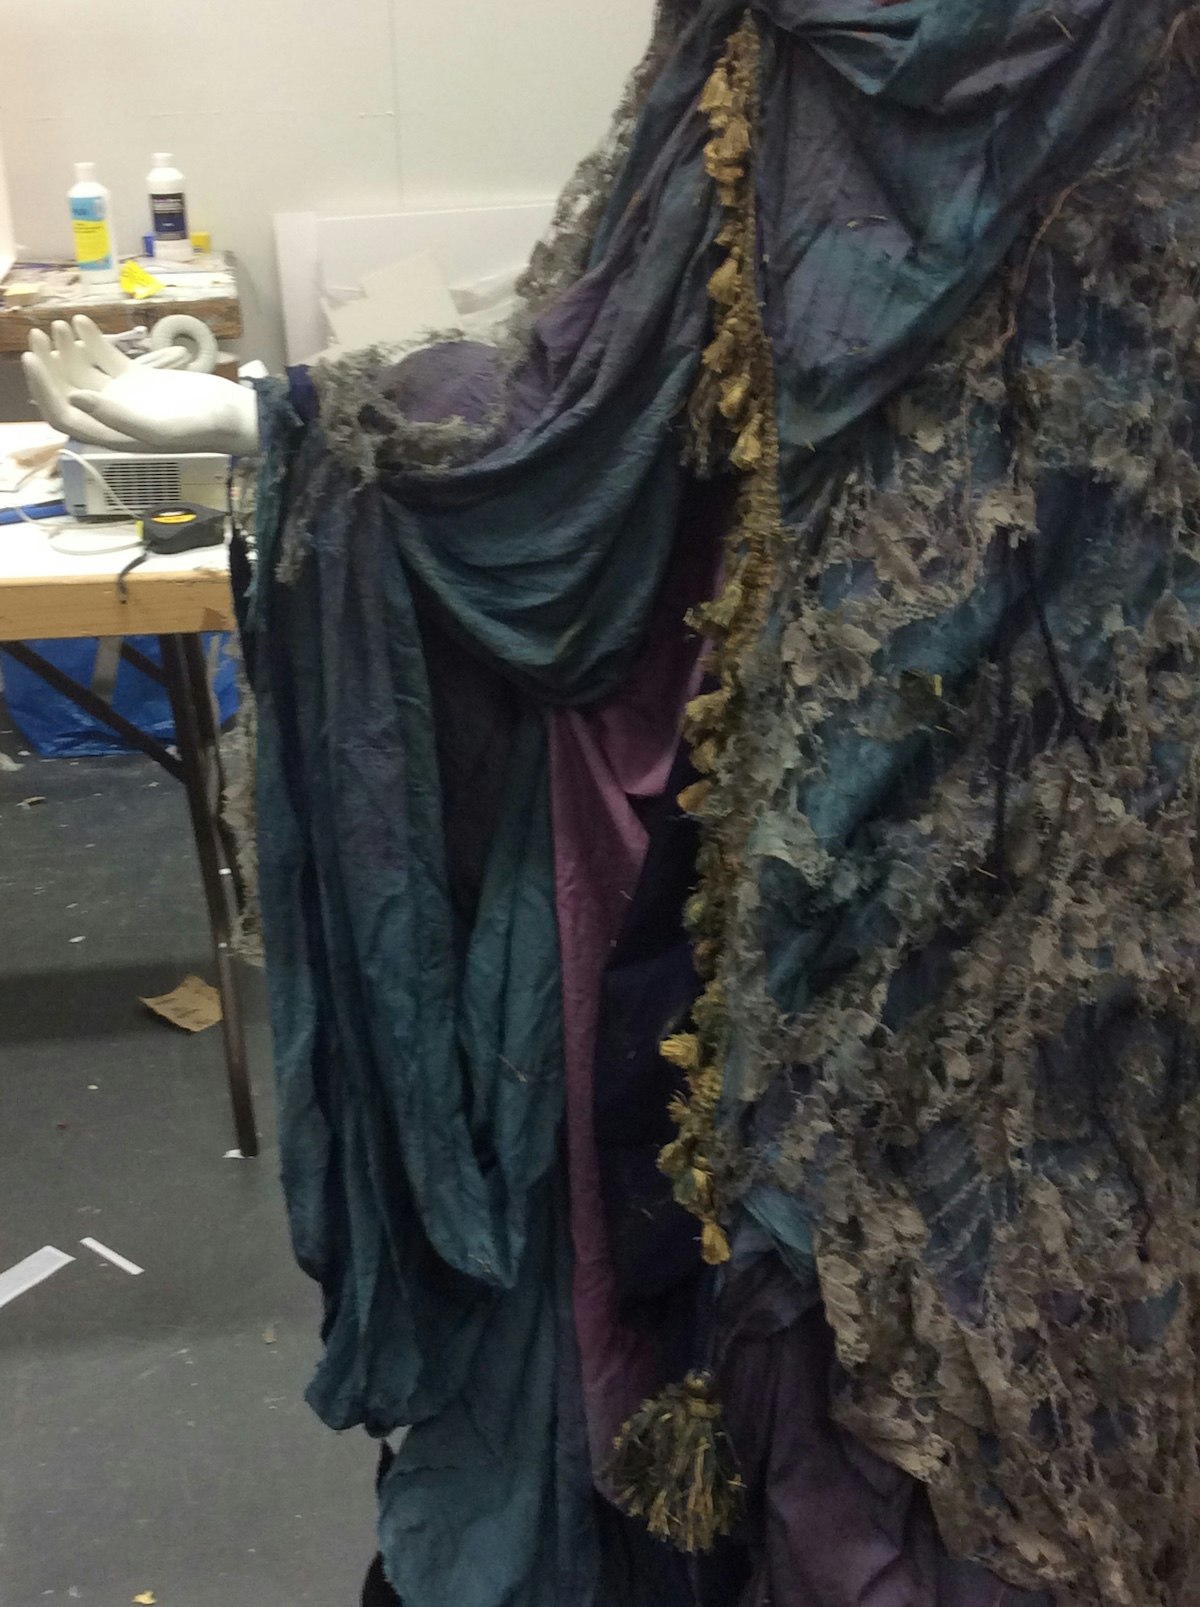
6. An arm hole was created, which would be used to reveal the hand carrying the lantern. The fabric was shaped and gathered to make an elaborate feature of this section.
7. Strips of fabric were ripped off larger section and left to dangle, which distorted the bottom edge. Others were sewn on to add extra colour and texture.
8. Tassel edging, the same as found on the headdress, was added to the front opening to frame the shape of the cloak and tie in the two pieces. The thin blue cord found on the horns was also sewn and draped to hung down the length of the cloak.
9. Tassels were added to the sleeve area and other key points to add detail and again match in with the headdress.
10. All the fabric was distressed using acrylic paint and sandpaper to add depth, body and interest to the finished look of the cloak.
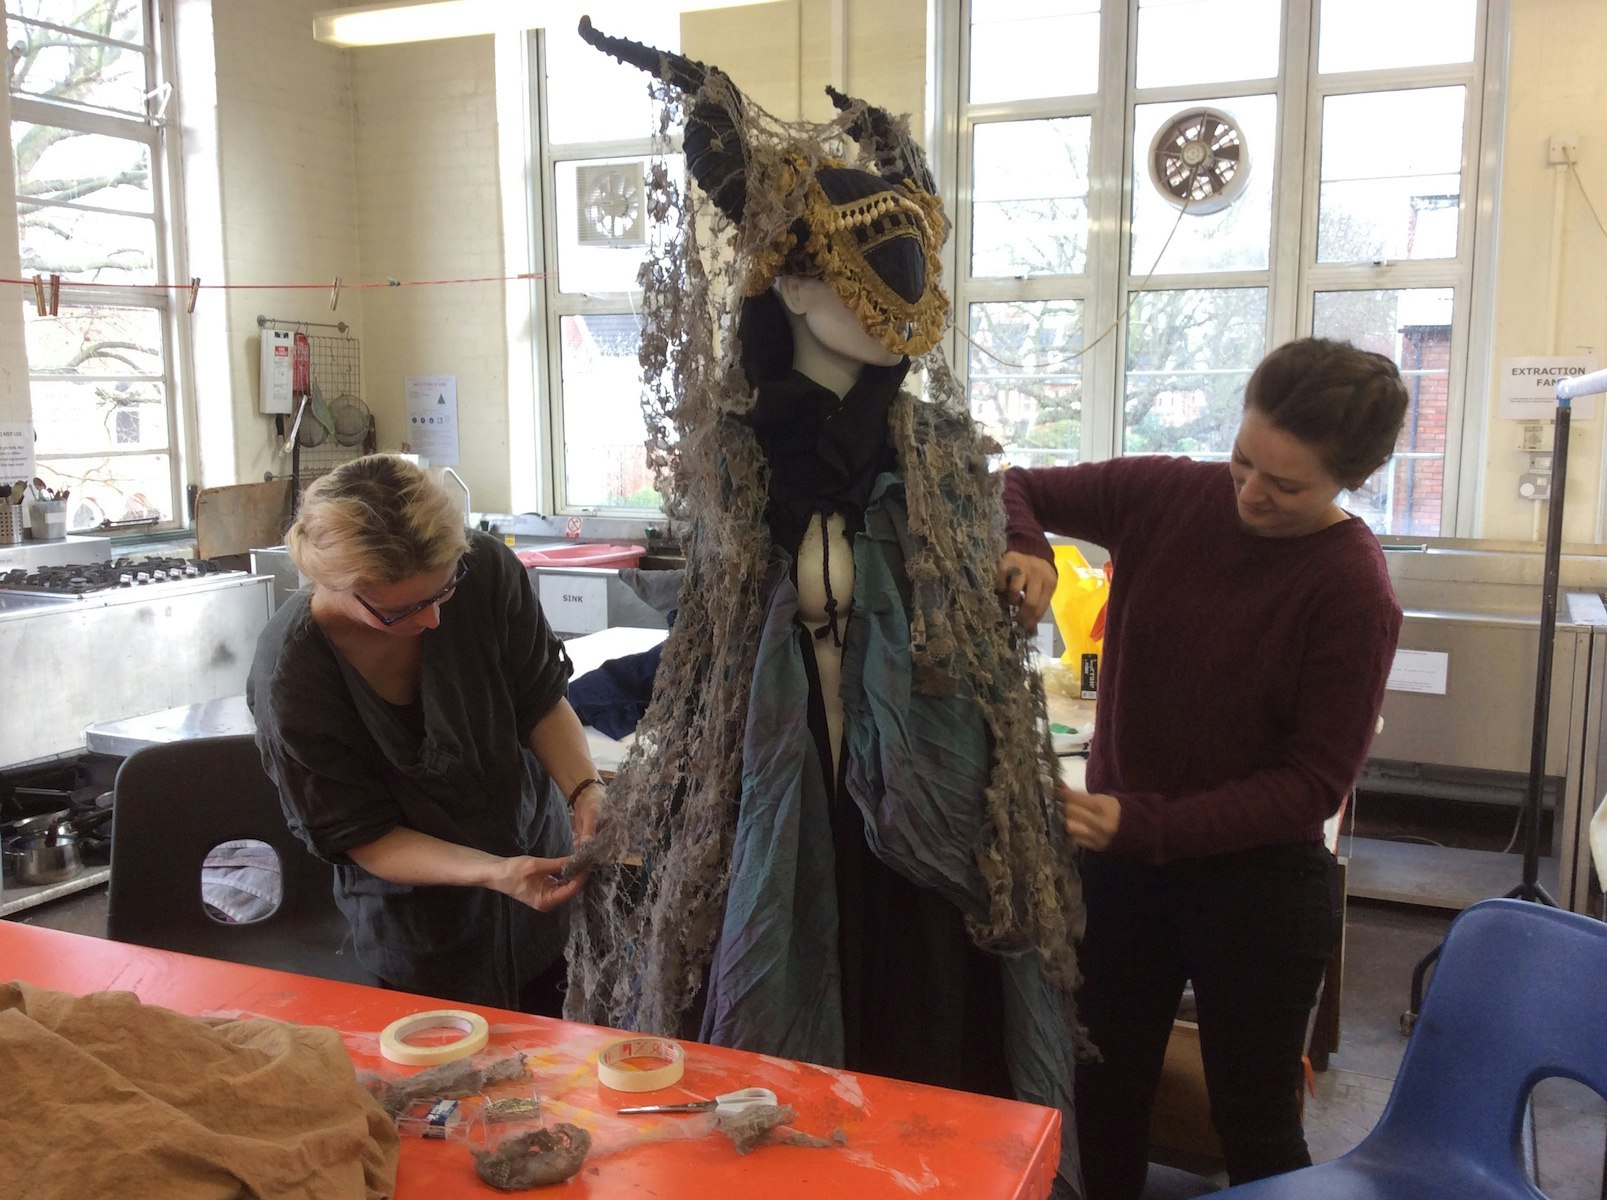
Finished Costume:
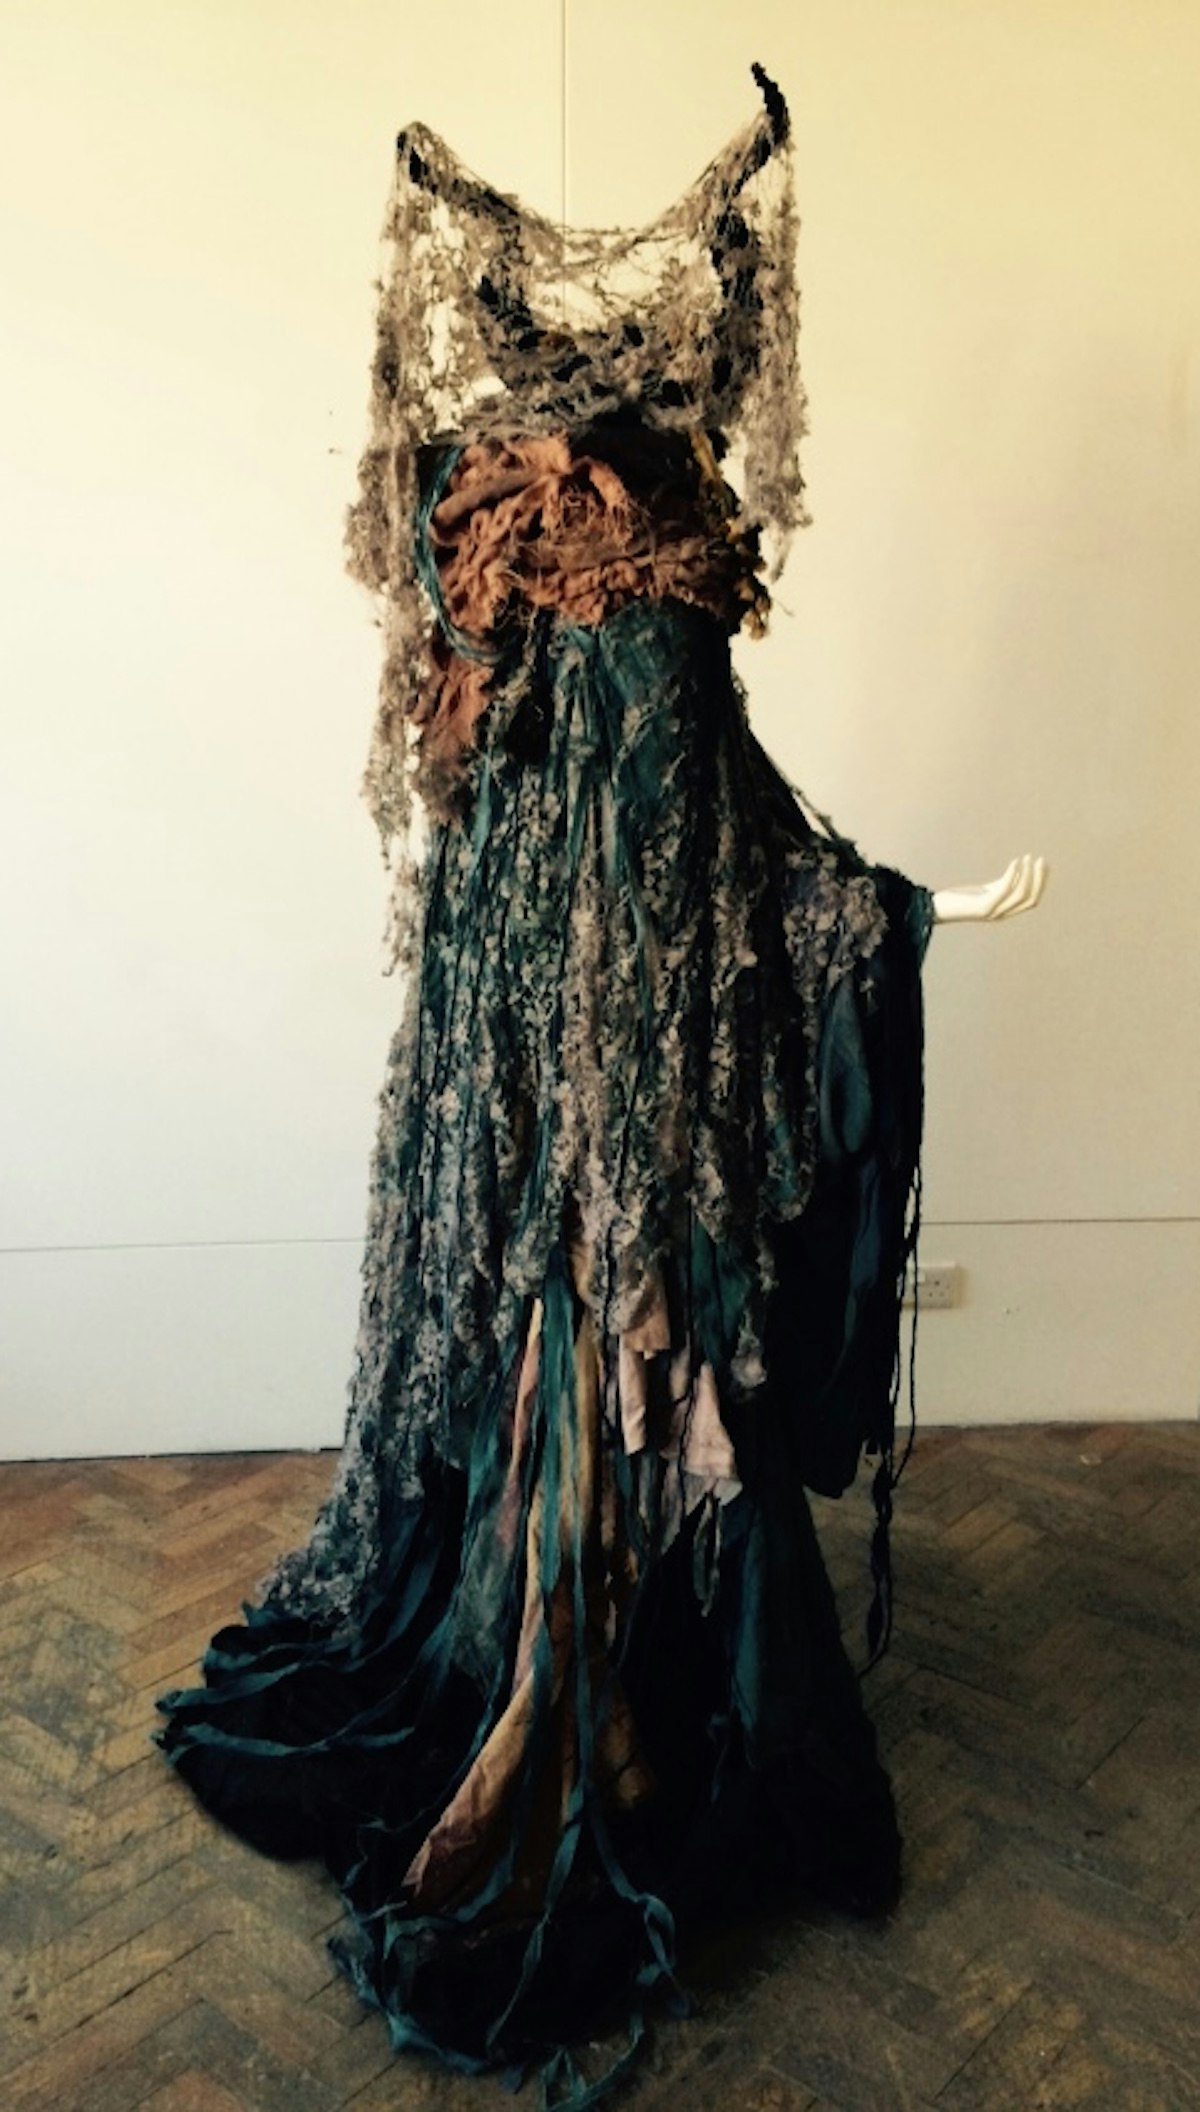
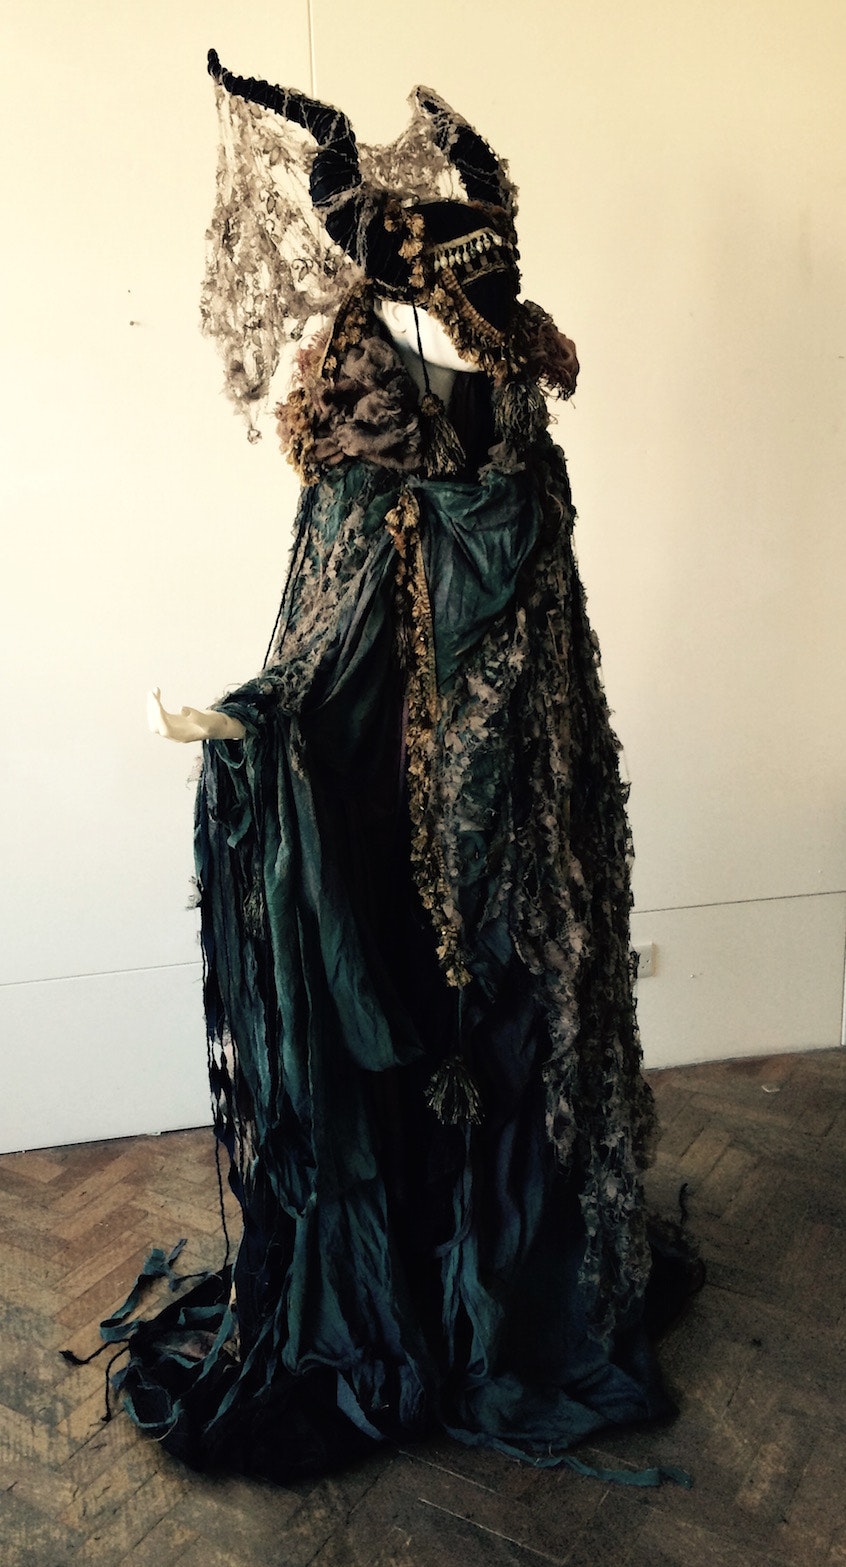
Please visit the collaborative project page, within the MA research section of my website for a full overview of this project.